
The Daily Art Hub design collection is called Gardening Things and you can find the entire collection here. This is the collection that I had picked out originally when I saw the article in Creative Machine Embroidery.

You can find the find the jpg file for the trowel here. Right click on the image and "Save AS". Create a new folder called "Garden Tote Tutorial" and save all of your designs there.

The first step (after you open the software and 'work through the wizard') is to Select NEW and then load the jpg and select the Oval hoop with foot #93 in the Artwork Source screen.

Then select the Trace (Convert to Outlines) option.

Then select Trace

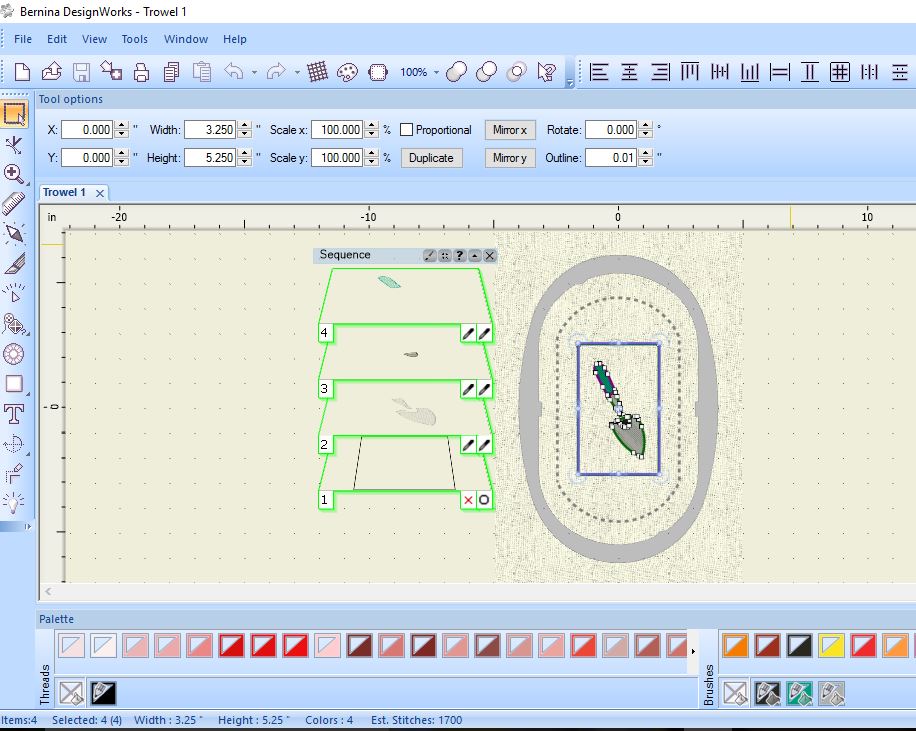
Then select Finish. Your screen should look like this.

Now wasn't that EASY?! The traced design is loaded ON TOP of the backdrop.

Now we need to be able to see how large our design is and if it will fit into the pocket area. To do that we have to OPEN a new file and load it into the software. Select Open and locate where you saved the Rectangle shape_DRAW file that you created.
Here is the file if you have yet to create your own.

Then COPY (right click on the file) and PASTE (right click on the file) the design onto the trowel screen. Change the rectangle to a Running Stitch with a Length of 3.5". This will be our basting box.

Drag the rectangle off of the design and place it to the side. We will now work on the trowel design. You will drag it back onto the hoop when you are ready to resize the design.

Notice the white background behind the trowel? The next step is to grab it and delete it.


Done!

Then we need the trowel going in the other direction. So type in 270 degrees in the ROTATE box in the Tool Options.

The trowel in the background is the Artwork image. If you would like to HIDE the image, follow the sequence below by Right clicking.
>VIEW>Backdrop>Hide
If you drag the rectangle back onto the image, you can now see that the design is too large for the space.

So drag the rectangle back off the image. Grab the rotated image and using the resize handles, drag it to fit inside the rectangle.

After I resized it to fit into the rectangle, I added both an outline and fill for each color. Notice the 'paint' chips on the lower right of the photo below.
Remember, I changed the Rectangle from a Paint line to a Running stitch 3.5" in length. This is the basting box for the design.
Drag the rectangle to the beginning of the Sequence Manager so it will stitch first. Right click on the both of the light gray parts of the trowel and select Combine. This will paint both sections at once.
You can find the finished DRAW file here. This file can only be opened in the DesignWorks software.
FILE>OPEN>trowel 1.DRAW
You can find the finished EXP here. This file must be opened in V7 or Artlink first. You then must send it to your machine or USB stick to paint it out.
FILE>EXPORT>Bernina
I then tested out my paint design. I used two Fabrico ink pens ( my gray is almost gone!) #165 Pine and #181 Cool Gray plus Eddings #12 Gray.

I lowered the green pen closer to the canvas because I didn't like the striped effect.

I centered the design using the "bullseye" screen and the marked horizontal and vertical lines. My rectangle is 'spot on' the top markings are wrong...

The fabric must have shifted slightly while painting but I called it good!
Thanks for hanging in there with this super long tutorial!

Why not give it a try?!

This is great and hope to play more tomorrow
ReplyDeleteGreat post, this guide helped me a lot, along with this best professional garden trowel article also helps more.
ReplyDelete