Friday, October 30, 2015

Welcome to F-U-N Friday Part 2

Welcome to F-U-N Friday!

(Be sure to read the previous post so you know where to find the free file!)

I found a project on the internet recently for a ribbon/tag blanket  toy similar to this. 

          
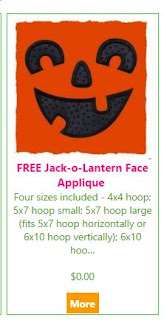
I decided to make one for my little pumpkin using the Jack-o-lantern face from GG designs.

When I have only one design to cut, I usually cut it on the Silhouette Cameo.  I opened the EXP design in my Floriani Total Control U software and deleted everything but the placement stitch.  You can save your design in the SVG format and then open it in the Designer Edition of the Silhouette software.

However this week the newest Silhouette software update has been released and it will read the Exp embroider files.  So I opened the 5 x 7 small outline and it was super easy to cut out the appliqué shapes.


I cut a piece of black fabric approximately 5 " x 7", sprayed it with Best Press and ironed Heat and Bond Lite to the back of the fabric.  After it cooled, I removed the paper backing and cut it out with the following settings:

Fabric - Thin fabric
Blade depth of 5
Speed of 3 and pressure of 33.


Not all designs are this easy to work with.   So I opened up the 5 x 7" Exp design and pulled the design apart.  You can see the 3 sections in the screen shot below.  I deleted the Satin Stitching and the Tack Down stitching and then used the placement line only.


I would recommend watching this video from Terri Johnson to help you understand how to locate the placement stitch within the embroidery design. 

 Here is the link to her blog www.terrijohnsoncreates.com


After I stitched the face onto my 10" square piece of fabric, I added the ribbon loops to the fabric. 

For the crinkle noise, I sandwiched a clean potato chip bag between the fabric and the terry cloth.


My finished design! 
 

 Here is my pumpkin face cutie-pie!

 Happy Halloween everyone!


Thursday, October 29, 2015

Welcome to F-U-N Friday! Part 1

Busy week here and I still can't believe it it the last week of October already! I decided to post F-U-N Friday early and have it in two parts.

Halloween is my FAV-orite holiday and I stitch up as many projects as I possible can!  

While surfing the internet I came across GG Designs- her designs are so cute! (sorry, I am into 'cute stuff' at the moment)


Here is her link to her FREE designs!  I love them all!  But the design I am working with today is the Jack-O- Lantern face appliqué.


        You can download the design here.

This was not an easy file to create a cutwork design.  Even though she included a 5 x 7 outline, the only part that I was able to quickly turn into an a cutwork file was the left eye.

The first step is to load the EXP outline into the DW software.

Convert the designs to a DRAW file.  Select all and select 'convert to curves'.


Be sure to add both a fill and an outline to the design.  Select the cutwork tool and oops....only the left eye fills in! 


 I knew right away that I had holes in the other parts of the design!  So I had to 'clean up' the design.

Select the design> Edit nodes ( second icon on the left) 

As I started to delete the nodes in the nose, you can actually see the hole in the design. How to fix that?  Select the node and right click and there is an option to 'close the outline'
 

I then started to work on the mouth and I did the same thing.  How do I know there is a hole?  Look carefully at the mouth in the Sequence Manager and you will see the scissors.  But the design is not filled in.


Zoom in and you see all of the nodes created with the 'tie-off' in this section.


I began deleting the nodes and I had two nodes left.  I deleted the one and it  filled in the mouth.

 
I was able to finish the design and create my placement box and the basting box. (oops - forgot the running stitch around!)


Even though I did not make this onesie for my little girl, I COULD HAVE! 


Part 2 coming tomorrow!


Wednesday, October 28, 2015

Welcome to Rewind Wednesday!


The lesson for "Rewind Wednesday" is going to be slightly different today!  Recently Dottie H. was looking for some additional cutwork designs and one of the links I sent her is from the free download on the Bernina site here.

Since she does not own the software, her computer had no idea what program would open up the designs.  You will notice there are 4 files in the zipped folder.

The DRAW file is the native format for the Bernina DesignWorks program. It is the only format in which you can resize, rotate or alter to create a new design.

Many of you received the DesignWorks tools with your Sterling Edition 880 machine.  You do NOT need the software to be able to use these tools only the correct file format.  

In order to be able to stitch/cut out the design on your machine, you must have all three files.  The BMP, EXP and Setup information.  Otherwise your machine will not be able to read/stitch out the design.  It is possible to send the DRAW file to your USB stick but the machine will not be able to read it.


There are free Paintworks files as well on the Bernina site here.  This is what the Mexico Paintworks file looks like after it is unzipped.
Here is the painted design in the DW software.  Notice  the Paintwork pens in the Sequence Manager and in the Brushes palette on the right.

I opened up the DRAW file in the software and changed the outlines from paint to a running stitch. Notice the running stitch on the Thread side of the palette.


The free crystal designs can be changed in the software as well.  You can change the size/color of the crystals and convert the design from crystals into stitches.

 You can find the free crystalworks files here.


I hope this helps to clear up the confusion regarding the different types of formats that your machine will read. What do you think Dottie?


Tuesday, October 27, 2015

Welcome to this week's Tidbit Tuesday!


I can not believe that this is the last week of October already!  Since Halloween is this Friday, I thought I would re-post the lesson using the symbols function in the DW software.

After working through the wizard, select a New graphic and None for the hoop. 

Under the Tools drop down select Insert Symbols or Crtl + F11.  Select Webdings from the Font menu and highlight the spider web.


Click Insert and using your mouse, draw the spider web shape.  Add your largest hoop to give you an idea as to the size of your design.


Now you create a painted spider web for a cute little T-shirt  or how about cutwork design using some black Kona cotton.


Then select the Appliqué function and select the running stitch to secure it in place.

Or my favorite is a Crystal spider web on a black T-shirt .
 

More information can be found under Help> Help topics> and type in >Insert symbol.  

More Halloween fun is coming this week!


Tuesday, October 20, 2015

Welcome to Tidbit Tuesday

It is another "Tidbit Tuesday"!

Summer is finally over here in Florida!  Yesterday morning it was 62 degrees! Yeah!!  It finally feels like fall.  This week's lesson for my DesignWorks Decoded class is called Winter Wonderland and it is all about snowflakes.  So I thought I would share a quick 'snow'tidbit with you.

Download the LP Snowflake from www.dafont.com here

Install the font onto your computer BEFORE you open up your software.

Open up your DW software and select NEW Graphic and the Oval Hoop with foot #26.

Select the Text tool and type in lpsnowflake.


Using the chart above, type in the letter "I" and select the rectangle icon (the first icon on the left).  This step converts it to the DRAW format.

Change the size to 2.75" - be sure to check Proportional.  Add a outline to your snowflake.


Click NONE for the Fill and change the outline to the Running stitch with a length of 3.0 mm


Be sure to test it out to see how it stitches out!  Have fun and "Let it Snow" (up north)