Showing posts with label Silhouette Cameo. Show all posts

Thursday, April 21, 2016

Converting Cutwork files into Silhouette files

If you are a lucky Diva, then you have the Bernina DesignWorks software AND a Silhouette Cameo!  I definitely use the Cutwork tool to cut multiple pieces for my larger projects, but when I need only one wing and one bird body, I use the Silhouette Cameo.

It is easy to convert the cutwork file to a Studio file following the tutorial below. Using the original cutwork file, delete the red basting box and change the cutwork back into a Line design.


Next >Right click>Break Apart

Next>File>Export>to SVG  Name the file Colorful Bird_SVG

Open the file in your Silhouette Cameo software. **You must have the Designer Edition to open SVG files.

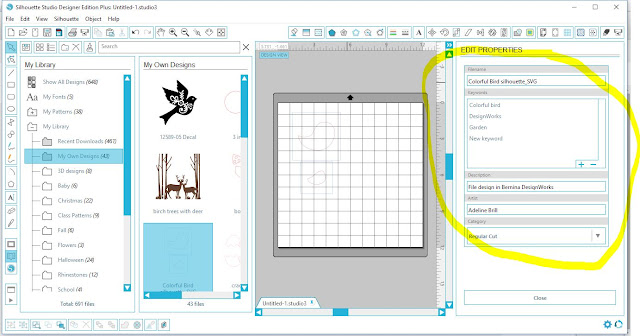
File>Import to Library>Select Colorful Bird_SVG (yes, I made two files!)


Next> Load it onto your mat.


Be sure to EDIT PROPERTIES and add your keywords, description and artist name!  Then later on, you will be able to find it easier!


Close "My Library" and the EDIT PROPERTIES panels.  The design comes in grouped and with a compound path.


Next> Select the bird and outside square>Group  
Select>Select the wing and outside square>Group

Next> SCALE the Bird to 3" and the wing to 2"


Next>Make Compound Path SAVE AS>Colorful Bird>Studio


Now you are ready to cut it out!  I iron Heat and Bond Lite t the back of the fabric and peel off the paper.  I cut the fabric pieces to fit in the grid space, for example the bird fabric piece is cut 4" x 4" and place in the corresponding space.

I have the best luck with the following settings on my machine but your machine may be different.


Here is my finished project.  I am not happy with my choice of fabric because it created a spot above the eye.  Oh well...


Next up - a lady bug design!


Wednesday, December 9, 2015

Welcome to Rewind Wednesday!

Welcome to Rewind Wednesday!  Is anyone else feeling the time crunch of the approaching holidays?  I sure do!


For today's lesson I created a quick video in which I feature how to make a cutwork, appliqué and Silhouette Studio file using Snowflake 5.  It is from the Colorful Snowflakes collection featured in yesterday's post.

I am sharing the Snowflake 5 jpg file here.  If you haven't signed up for the daily emails from www.dailyarthub.com, make sure you stop by often to check out their free daily design!


A few added notes from the video!

*For your fabric selection, choose Cotton 2 - mine is set for linen.

*Choose your hoop size and #44C when you are creating the Cutwork file.

*Choose your hoop size and #26 when you are creating your Appliqué file.


Here is a link for a quick holiday wine bag I found on Embroidery Library.  This is perfect pattern for an assortment of snowflakes!


I hope you are inspired to give this a try!  If you have any questions, post them in the comments and I will do my best to answer them!


Friday, October 30, 2015

Welcome to F-U-N Friday Part 2

Welcome to F-U-N Friday!

(Be sure to read the previous post so you know where to find the free file!)

I found a project on the internet recently for a ribbon/tag blanket  toy similar to this. 

          
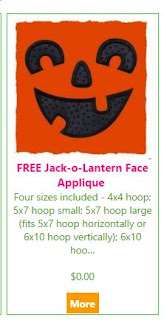
I decided to make one for my little pumpkin using the Jack-o-lantern face from GG designs.

When I have only one design to cut, I usually cut it on the Silhouette Cameo.  I opened the EXP design in my Floriani Total Control U software and deleted everything but the placement stitch.  You can save your design in the SVG format and then open it in the Designer Edition of the Silhouette software.

However this week the newest Silhouette software update has been released and it will read the Exp embroider files.  So I opened the 5 x 7 small outline and it was super easy to cut out the appliqué shapes.


I cut a piece of black fabric approximately 5 " x 7", sprayed it with Best Press and ironed Heat and Bond Lite to the back of the fabric.  After it cooled, I removed the paper backing and cut it out with the following settings:

Fabric - Thin fabric
Blade depth of 5
Speed of 3 and pressure of 33.


Not all designs are this easy to work with.   So I opened up the 5 x 7" Exp design and pulled the design apart.  You can see the 3 sections in the screen shot below.  I deleted the Satin Stitching and the Tack Down stitching and then used the placement line only.


I would recommend watching this video from Terri Johnson to help you understand how to locate the placement stitch within the embroidery design. 

 Here is the link to her blog www.terrijohnsoncreates.com


After I stitched the face onto my 10" square piece of fabric, I added the ribbon loops to the fabric. 

For the crinkle noise, I sandwiched a clean potato chip bag between the fabric and the terry cloth.


My finished design! 
 

 Here is my pumpkin face cutie-pie!

 Happy Halloween everyone!