Showing posts with label Tidbit Tuesday. Show all posts

Tuesday, December 8, 2015

Welcome to Tidbit Tuesday!

Just a little tidbit - not too big of a morsel to digest! That is what today's lesson is all about!


This week I am featuring designs from the Colorful Snowflakes from www.dailyarthub.com


After you download the file, select the first snowflake from the PNG folder and load it into the software.( hmm - where did I put that folder?...)


Oh - there it is!.... Select your largest hoop using the #93 foot.


Next - select the TRACE function.

Then trace the design....

Look - there are only two colors!  This will be easy!


The background of this design is white and so I will drag it over and then delete the white background.  How to do this?  Just click on the upper right hand corner of the white box and drag it to the right with your mouse.


Hit the delete button on your keyboard.

Oh no! The inside of this snowflake has a white fill and if I delete it, it will be a solid designs.
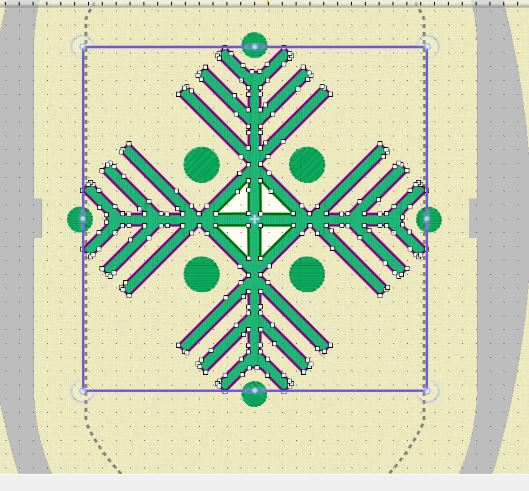
The Trim tool is the 3rd icon from the right on the toolbar above. Think of it as a pair of scissors and you are going to snip out those little sections from the inside of your snowflake.


So hold down the shift key and select each of the sections AND then the entire design.  Select the trim function and it cuts out the design. Delete the little white triangles.


And like magic, I have a clean painted design!   Save your design as Snowflake1_PAINT.DRAW


The last step was to hide the PNG snowflake file ...>View>Backdrop>Hide


Save your design as Snowflake_PaintBorder.DRAW and send it to your USB stick.

After I loaded this into my machine, I selected Endless Embroidery and added one more design.  I must admit it was quite large.  You may want to reduce it to create a border for a holiday towel design.


I hope you enjoyed this lesson today.  It was a chilly 52 degrees this morning here in Tampa, Fl.  Why not leave me a comment with the temperature and your location?  


Tuesday, October 27, 2015

Welcome to this week's Tidbit Tuesday!


I can not believe that this is the last week of October already!  Since Halloween is this Friday, I thought I would re-post the lesson using the symbols function in the DW software.

After working through the wizard, select a New graphic and None for the hoop. 

Under the Tools drop down select Insert Symbols or Crtl + F11.  Select Webdings from the Font menu and highlight the spider web.


Click Insert and using your mouse, draw the spider web shape.  Add your largest hoop to give you an idea as to the size of your design.


Now you create a painted spider web for a cute little T-shirt  or how about cutwork design using some black Kona cotton.


Then select the Appliqué function and select the running stitch to secure it in place.

Or my favorite is a Crystal spider web on a black T-shirt .
 

More information can be found under Help> Help topics> and type in >Insert symbol.  

More Halloween fun is coming this week!


Tuesday, October 20, 2015

Welcome to Tidbit Tuesday

It is another "Tidbit Tuesday"!

Summer is finally over here in Florida!  Yesterday morning it was 62 degrees! Yeah!!  It finally feels like fall.  This week's lesson for my DesignWorks Decoded class is called Winter Wonderland and it is all about snowflakes.  So I thought I would share a quick 'snow'tidbit with you.

Download the LP Snowflake from www.dafont.com here

Install the font onto your computer BEFORE you open up your software.

Open up your DW software and select NEW Graphic and the Oval Hoop with foot #26.

Select the Text tool and type in lpsnowflake.


Using the chart above, type in the letter "I" and select the rectangle icon (the first icon on the left).  This step converts it to the DRAW format.

Change the size to 2.75" - be sure to check Proportional.  Add a outline to your snowflake.


Click NONE for the Fill and change the outline to the Running stitch with a length of 3.0 mm


Be sure to test it out to see how it stitches out!  Have fun and "Let it Snow" (up north)


Tuesday, October 13, 2015

Tidbit Tuesday

Welcome to "Tidbit Tuesday"  I have been so busy since I returned from my vacation that the DW software has taken a back seat!


 On Monday, Miss Kate Cuttables shared this freebie on her site


After you trace it, the design comes in with some of the lettering filled in. So how do you fix this?


The trim tool! (The third icon from the left!)

Select the inside space and the outer design and then select the trim tool.


The design will turn green with a redline around the trimmed part of the design. 


The design has now been trimmed and the 'holes' are filled in.  Notice the 'h' and 'g' as well as the "h" in night.   Each section was a step and practice using the 'trim' tool!
 

It is a tedious process which yields BIG results! So do give it a try!


Tuesday, September 22, 2015

Tidbit Tuesday

Yes, it is another Tuesday! SO let's get started!


Rather than bring up an old tidbit, I thought I try mixing the two!

One of my favorite font sites is www.dafont.com  Lots of choices for me! 

Recently Bernina had a Designworks webinar "Designworks Lettering - Have it Your Way".  It is still available on their site.  

Here is the link for the webinar.

Here is the link for the handout.  Print it and follow the hadnout if you are new to DesignWorks Suite.

Let's start with the TEXT tool.  In order to add text, you have to select the TEXT tool from the  tool bar or your hot key is F8


Your cursor will start blinking and you can start typing your text.  I love subway art and I thought I would give it a 'go' in the DW software.

If you are not familiar with subway art, just google it!  This idea is rather intense and includes a whole slew of different fonts.  But you get the idea!


This sample is much easier and a perfect place for us to start!


Working through the wizard, select your largest hoop and foot #93 (this is a Paintworks design!)  Draw a large rectangle as this will be your 'frame'.

Begin typing your words and changing the fonts and colors with each special phrase.  I added a few designs from the www.dailyarthub.com 

Check out this great site to download a variety of Halloween fonts here.


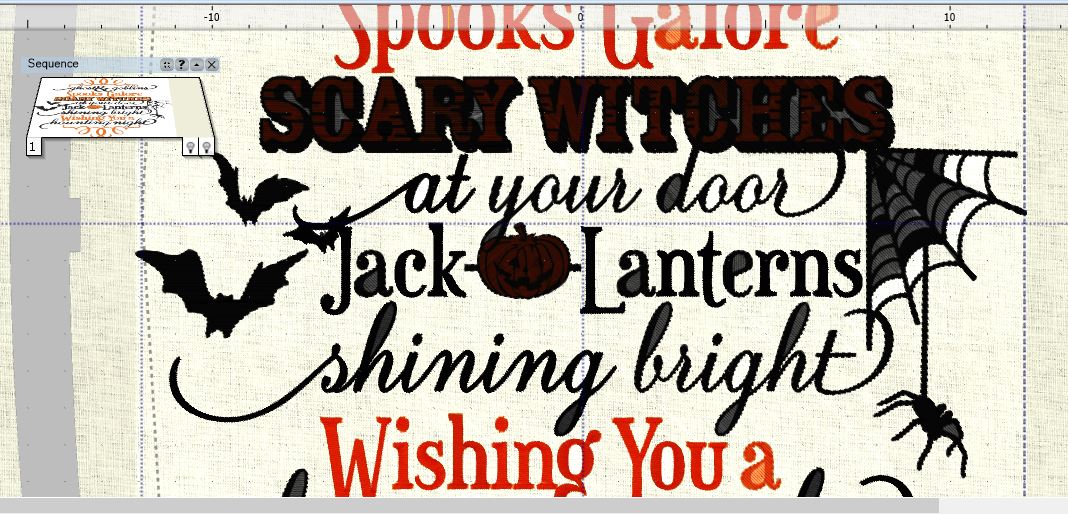
Here is my finished idea.  This would make a cute garden flag or frame it for a festive accent to your home!


Why not give it a try?